
How to Take a Breast Root Trace
If you’ve spent any time researching the art and science that is bra-making, you may have stumbled across the term “breast root trace”. This copy of the crease underneath your breast (AKA Inframammary Fold or IMF for short) will help you select an underwire (and in some cases, wireless bra patterns such as the Lanai) that best matches your body. A perfect or near perfect match is one of the keys to a pain-free underwire bra wearing experience.
What is a Breast Root Trace?
A breast root trace is an approximation of the shape of your breast root. The trace is generally done by using a flexible curve ruler (the drafting type with a bit of metal embedded in the middle) as it is available in art supply, office supply and fabric shops. Other materials such as gear ties, copper wire, larger gauge floral wire, bonsai wire, or picture frame wire can also work. In a pinch, a rolled up piece of aluminum foil will give a rough idea as well. For the truly intrepid, a Contour Gauge Duplicator (used in construction) may also be up to the task.
Why do a Breast Root Trace?
A Breast Root Trace is particularly important in underwire bras as this crease is where an underwire SHOULD reside in order to transfer the weight of the breast to the torso. This allows the body to take on the bulk of the weight/support to reduce the strain on neck and shoulders. [Additional details on wired vs wireless bra support, click HERE].
Breasts not only come in different sizes (volume) but also different shapes, heights, densities and orientation - all of which affect the shape of the breast crease. In short, two people with the same breast volume (bra size) can have very different breast root shapes leading one or both to have wires jabbing into them. [Additional details on different breast shapes, click HERE}.
Underwires ALSO come in different shapes, styles, densities and lengths. The key to wired bra nirvana is finding a wire that matches your body.
How to take a Breast Root Trace?
While there are already a few resources online on how to take a breast root trace [HERE and HERE], our approach is slightly different. Check out the demo video!
Smaller and/or Self Supporting Breasts
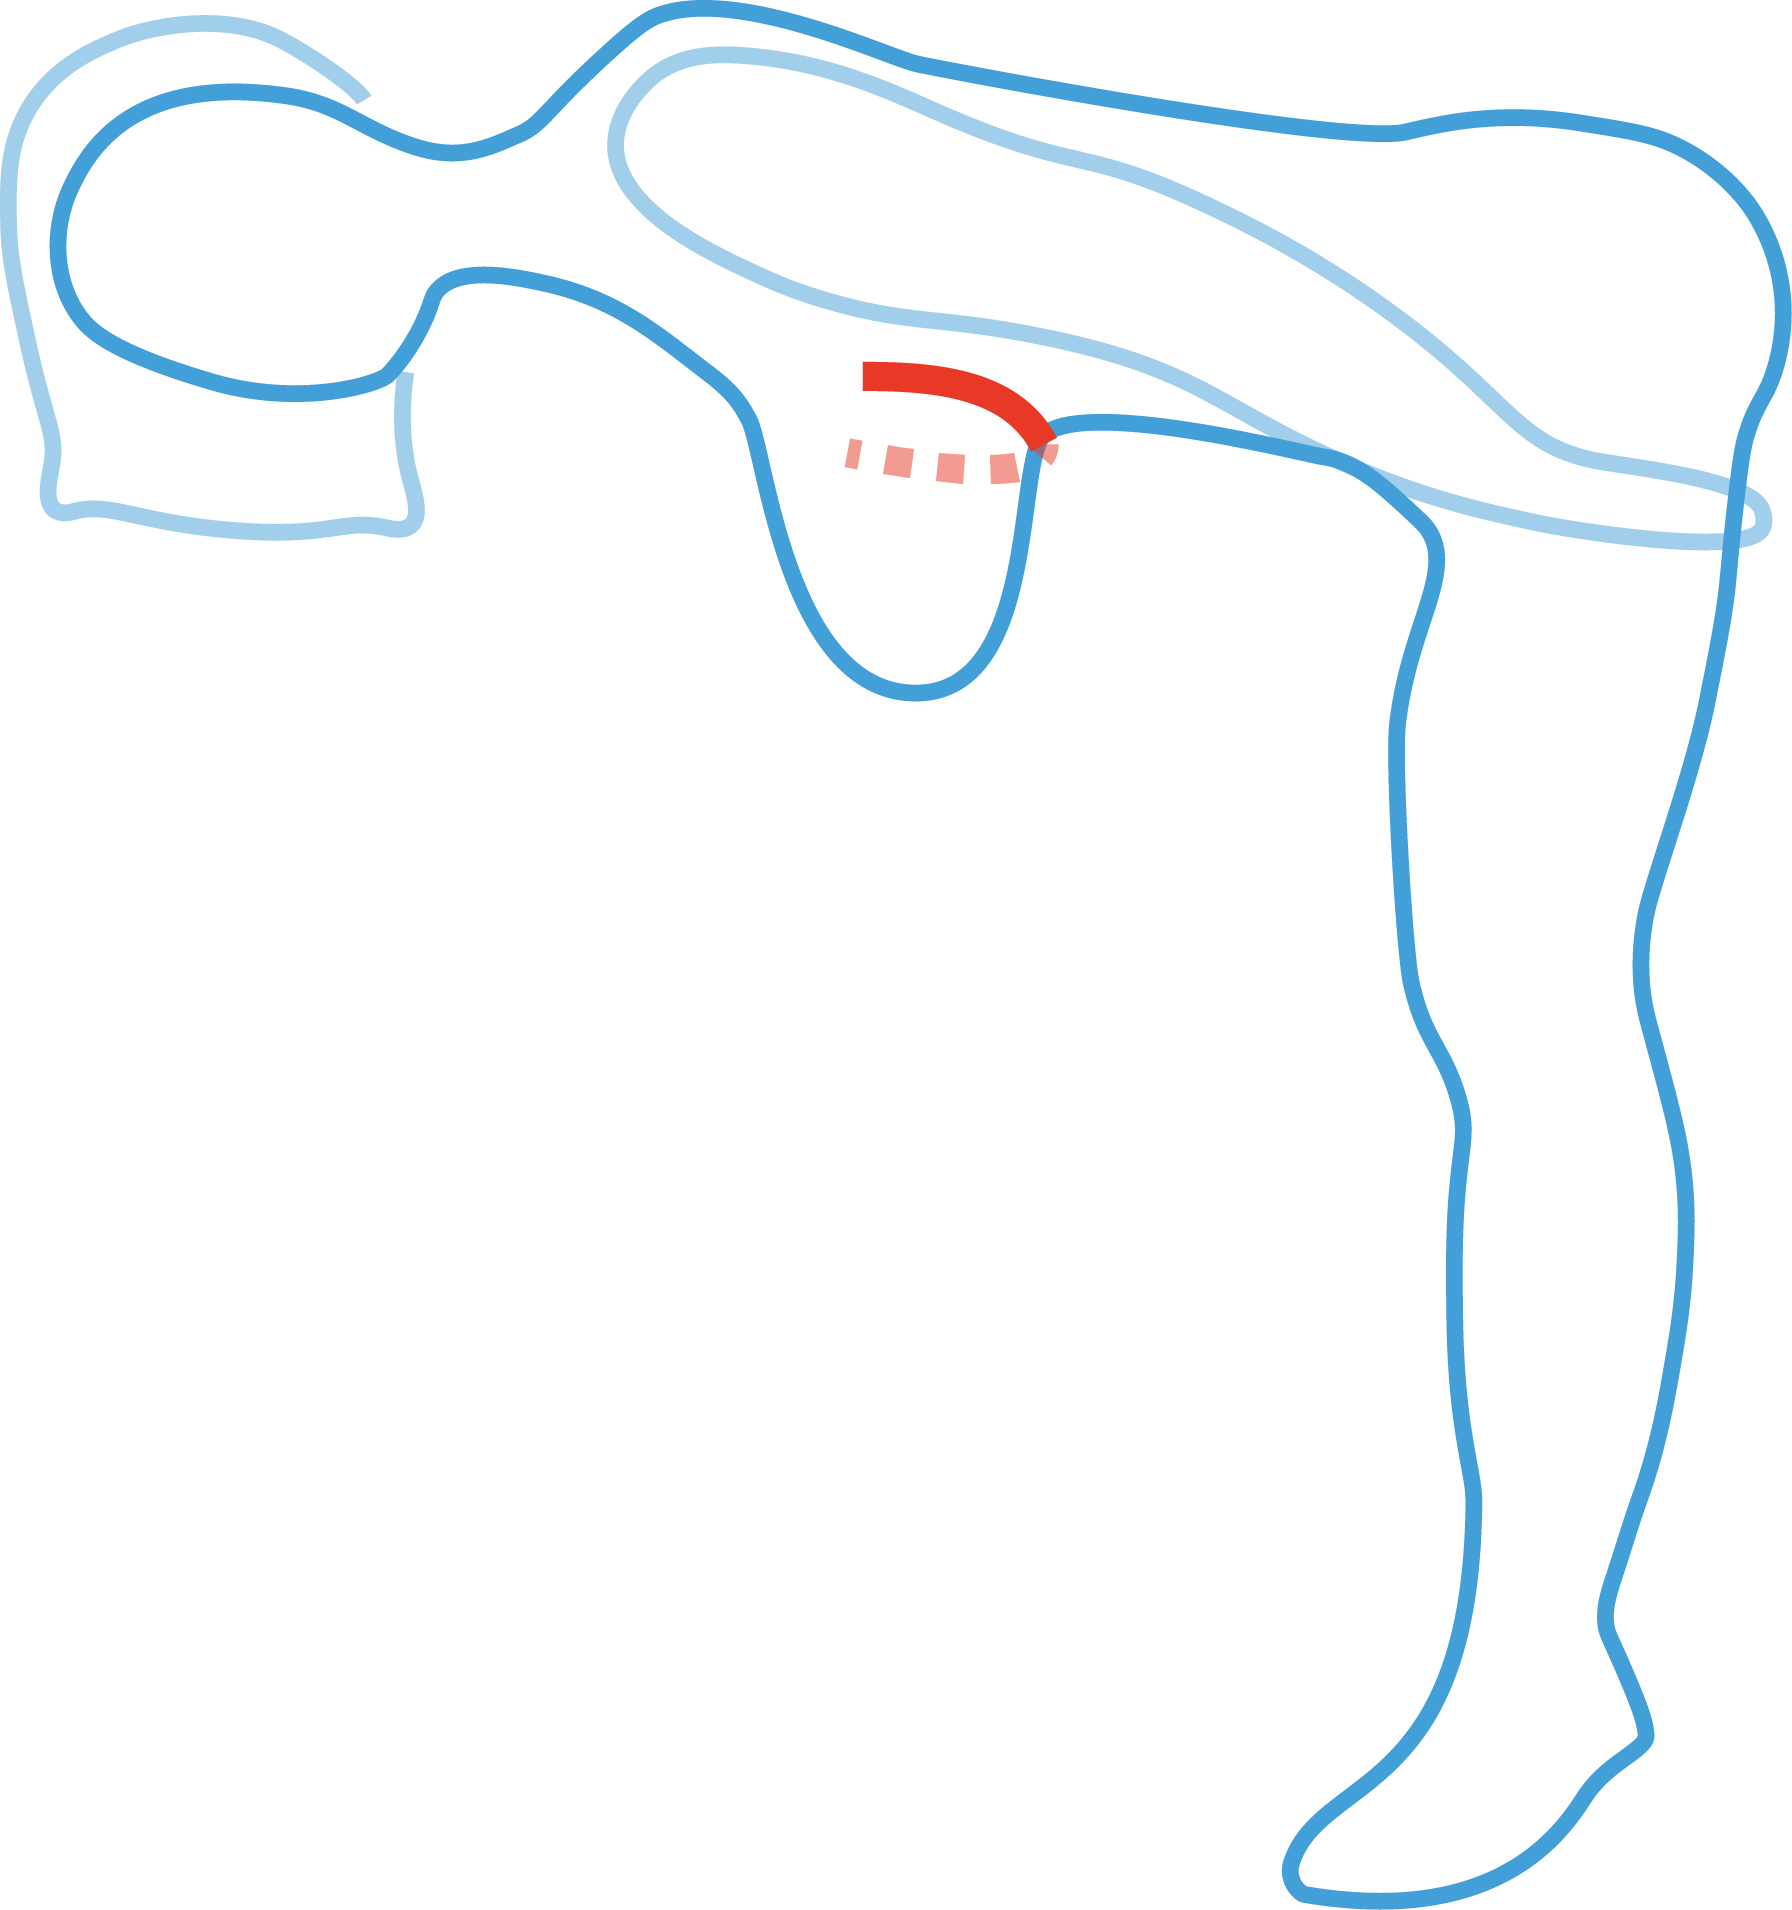
Begin with your larger breast and raise the corresponding arm above your head. Using your free hand or an assistant, use the flex ruler/wire to press the ruler around the breast crease (Inframammary Fold or IMF) with one end toward the middle of your chest.
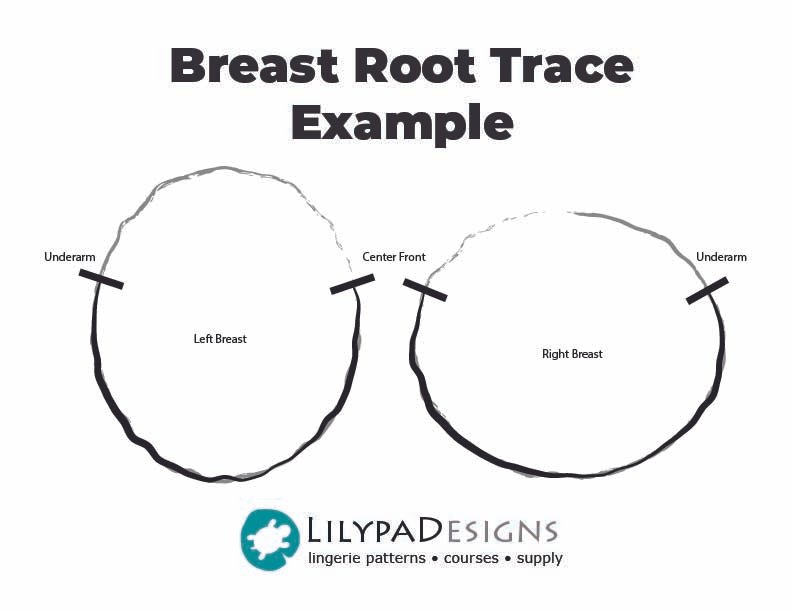
The curve of the flex ruler/wire should follow your IMF as closely as possible. Then quickly transfer to a sheet of paper and trace the inside curve. Repeat the process for the other breast as they may be different. Be sure to label each trace - left or right.

Larger and/or Pendulous Breasts and/or Measuring without Help
Begin by bending over at the waist and letting the breast hang freely. Take one end of the flex ruler/wire in each hand and press the ruler around the breast crease (Inframammary Fold or IMF) with one side toward the middle of your chest.
The curve of the flex ruler/wire should follow your IMF as closely as possible. Then quickly transfer to a sheet of paper and trace the inside curve. Repeat the process for the other breast as they may be different. Be sure to label each trace - left or right.
If the IMF is not present or hard to find, try pushing the breast mound toward the underarm to temporarily create a crease and mark it with a washable marker. Sometimes palpating the area (with eyes closed and leaning) can help differentiate between tissues - similar to a breast exam. Another option would be to trace the indentation left at the end of the day after wearing your best fitting bra. If you’ve tried all of these methods and are still unsure, the last option is to try a number of different underwire sizes AND styles in a fitting band.
Encourage flex ruler to keep the shape by encircling the breast.
Due to the nature of the flex rulers, the trace may not want to stay in shape for very long. Encourage it to stay by curling the ends in a bit as it will relax slightly once its time to trace. You can go as far as to create a “circular shape” with the ruler before transferring to paper. Just be sure to note which side is the center front and the which is the underarm and approximately where the wire tip would end. This process may take a few attempts. It may help to have the wire charts out to compare shape (ie. Day Wear, Omega, Vertical, Vertical Flat, etc).
I’ve got my Trace, Now What?
Once you have your breast root trace, you can print out the PDF Wire Chart from your favorite vendor and compare. Underwires come in different shapes (ie. Regular, Vertical, Strapless, Plunge and Flat Bottom, etc), Wire Charts also reflect this. If your trace is tall and narrow, take a look at Vertical wires. Short and wide? Regular or Day wire. Flat bottom? Wide Vertical or Flat Bottom wires. Plunge and Strapless wires are purpose based.

Match the general shape first, then match the base curve. A too narrow curve means the wire will either sit on breast tissue or slide down. A too wide curve (an accompanying too wide wire opening) can reduce projection and cause a minimizing effect.
Next, take a look at the wire opening - the distance between the wire ends. Ideally, you’ll want the wire to be slightly (say, 15mm or 5/8”) narrower than the trace itself as most bra patterns (including store bought ones) include something called wire spring. Different types of wires have different amounts of spring (especially, say, heavy duty wires vs flex wires) so its best to have some on hand to test. In general, the thicker the wire, the less spring it will have. Retail manufacturers use between 15 and 55mm of wire spring depending on size and gauge - the larger the size, larger the spring. Some lingerie pattern companies do NOT include wire spring in their patterns, in this case, simply find the wire that best matches your breast root trace.
Once you’ve determined the best wire match, order that size as well as a few adjacent sizes. This is more efficient use of time (and shipping) as the amount of spring for a particular wire may differ based on gauge and composition. The best fitting wire is usually somewhere between the leaning (smallest) and standing (largest) trace but skewed toward the smaller side. Thus prudent to purchase a few wire sizes up when using the leaning trace or add a few sizes down when using the standing trace. Heavy duty wires have less flexibility and may also necessitate going up a size for comfort. For those who are too excited sit around while waiting for the wires to arrive, find the cradle size that best matches your wire/breast root trace. A LilypaDesigns patterns include a Cradle Chart (not to be confused with a Wire Chart) to make finding a matching cradle size a breeze. Once the cradle size is determined, a quick and dirty “test fit” can be done with paper. Print/trace your cradle pattern pieces (center gore, side cradle and back wing) on cardstock, remove seam allowances and duct tape together then hold against the body. This will allow you to check not only the wireline but the torso shape/rib cage fit.

For wireless bras with a full frame and a “wireline” like the Lanai, Kwik Sew K3594, and Queen Elite, simply lay your trace on top of the cradle size chart and find the best match.
*Bonus: Why Measure Leaning/Bending?
Viscous breasts are affected by gravity in a way that is different than someone who is self supporting. The breast tissue not only pulled downward but also spreads from the weight, creating a wider breast root. A too wide wire can jab you in the arm AND have a minimizer bra effect.
Taking a breast root trace while leaning has a few advantages for those with large breasts and/or soft tissue.
Allows use of both hands
Approximates the lift that an underwired bra would ideally provide.
Reveals the shape of the breast crease unencumbered by gravity.