Same Pattern, Different Design Decisions - Lotus Wireless Edition
Sometimes you just don’t want to do the “usual” thing.
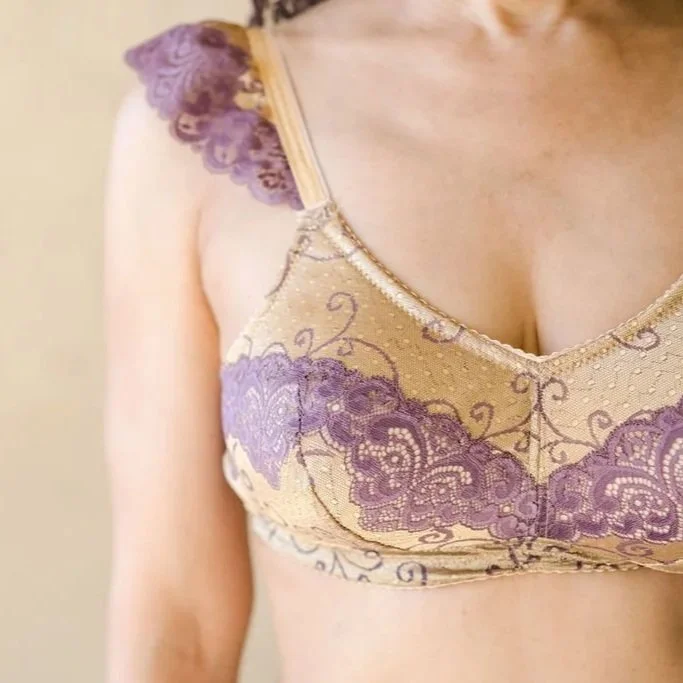
With this version of the Lotus Bra Pattern, we really wanted to highlight the purple in this very regal lace… but without defaulting to the classic lace-edged neckline. With limited color-coordinated options, we had to get creative.
A little lace layering and blocking created a soft sweetheart effect, broke up the wide expanse of the wireless cup, and let the purple detail take center stage. Standard beige lingerie elastics and hook and eye actually worked beautifully here, blending into the gold tones and allowing the purple to really pop without hunting for an exact match.
The biggest challenge? The straps. Converting to a non-stretch strap to use the same lace would have been the easiest solution… but it felt like it was missing that extra punch from the purple lace edge. Then we found it — a perfectly matched (and admittedly very flimsy) lingerie elastic hiding in the stash. With a little stabilization and layering, it worked a treat.
Without further ado, lets get to it:

Lotus Pattern w/ design hack
Original Lotus Pattern
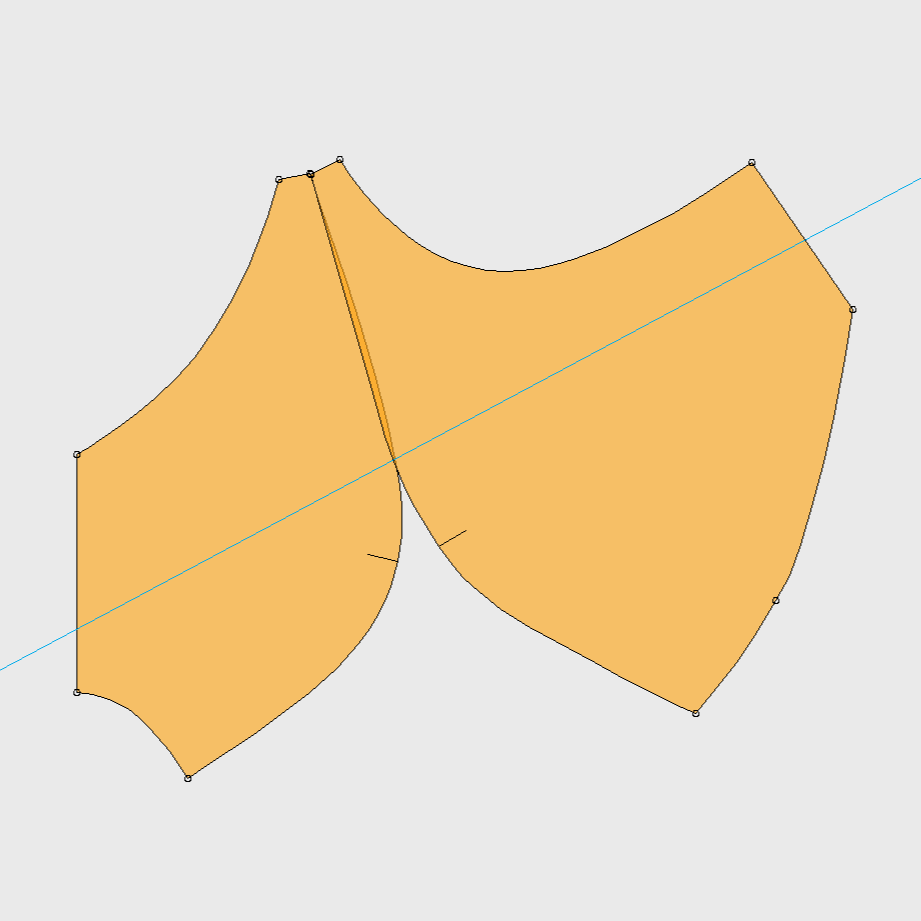
Cup Blocking Instructions
STEP 1
Remove seam allowance. Align the upper portion of the vertical of the cup pattern pieces with little to no overlap.
STEP 2
Mark the spot where the two pattern pieces intersect. Then mark where you want the lace portion to start at the CF seam. Draw a straight line through both point then cut along the line. The straight edge *magically* curves in 3D.
STEP 3
Add seam allowance back on for all edges except the lace edge of the bottom cup section. For the the upper part of the cup, consider using a wider seam allowance at the (new) diagonal seam to allow for better overlap.
STEP 4
Align lower cup lace panel on top of the upper and zig zag the lace edge to secure. Treat as one for the remaining instruction steps.
Strap Hack Instructions
STEP 1
Cut lace edge to desired width and length
STEP 2
Encase the raw edge of the lace inside a similar color foldover elastic with stabilizer.
STEP 3
Top with color coordinating lingerie lace. Note - we combined step 2 and 3 with only one pass through the machine (very slow and and steady here). Another alternative is do use washaway thread in Step 2 and regular thread in Step 3 - this keeps the bottom of the strap looking clean and minimizes potential rubbing due to extra thread.