
Tutorial - How to Alter the Bottom Cup Depth of Koma Wireless
Learn how to alter the Bottom Cup Depth (while keeping the width) of a bra cup! While this tutorial is tailored for the Koma Wireless, it can be used for ANY pattern with a 2-piece cup with similar seaming including the Lotus Wireless. That said, we wanted to cover ONE method of increasing/decreasing the bottom cup depth (BCD) of the cups in detail and utilizing the “Layers” option in Adobe Reader (FREE). For a primer on using Layers in Adobe Reader click [HERE].
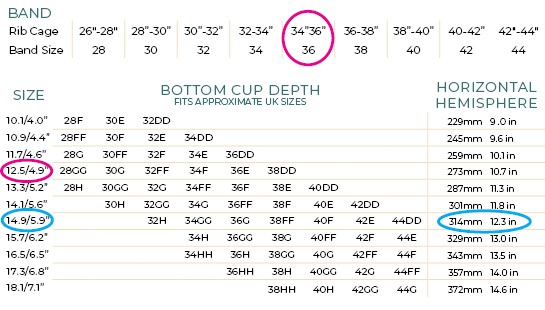
In our previous sample [HERE], Heidi’s measurements indicate:
Horizontal Hemisphere (HH) = size 14.9cm/5.9”
Bottom Cup Depth (BCD) = size 12.5cm/4.9”.
This means she needs the volume of the larger HH but a shorter BCD. We can accommodate that by reducing the BCD of the 14.9cm/5.9” to 12.5cm/4.9”. Begin by removing the seam allowance.
Larger Cup Size and Smaller BCD
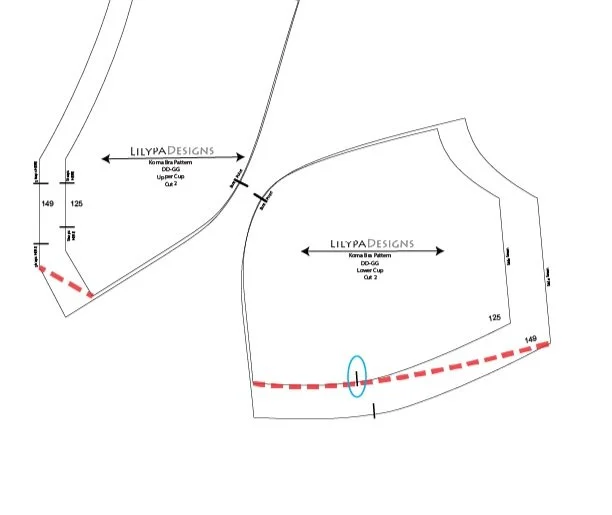
Larger cup size (HH) and smaller BCD adjustment.
Start with the Upper Cup as it is the easiest. Draw a straight line from the Center Front Corner of the larger size to the BCD corner of the smaller size.
For the Lower Cup, start at the BCD corner of the smaller size following along the curve through the registration point then to the Side Seam Corner of the larger size.
Smaller Cup Size and Larger BCD
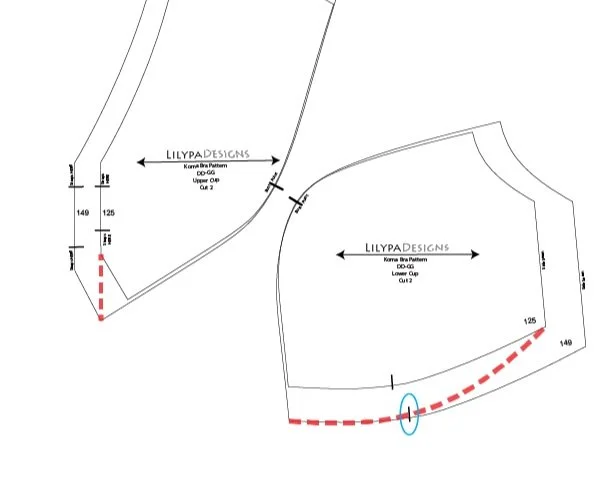
Smaller cup size (HH) and larger BCD adjustment.
Start with the Upper Cup as it is the easiest. Draw a straight line from the Center Front Corner of the smaller size to the BCD corner of the larger size.
For the Lower Cup, start at the BCD corner of the larger size following along the curve through the registration point then to the Side Seam Corner of the smaller size.