
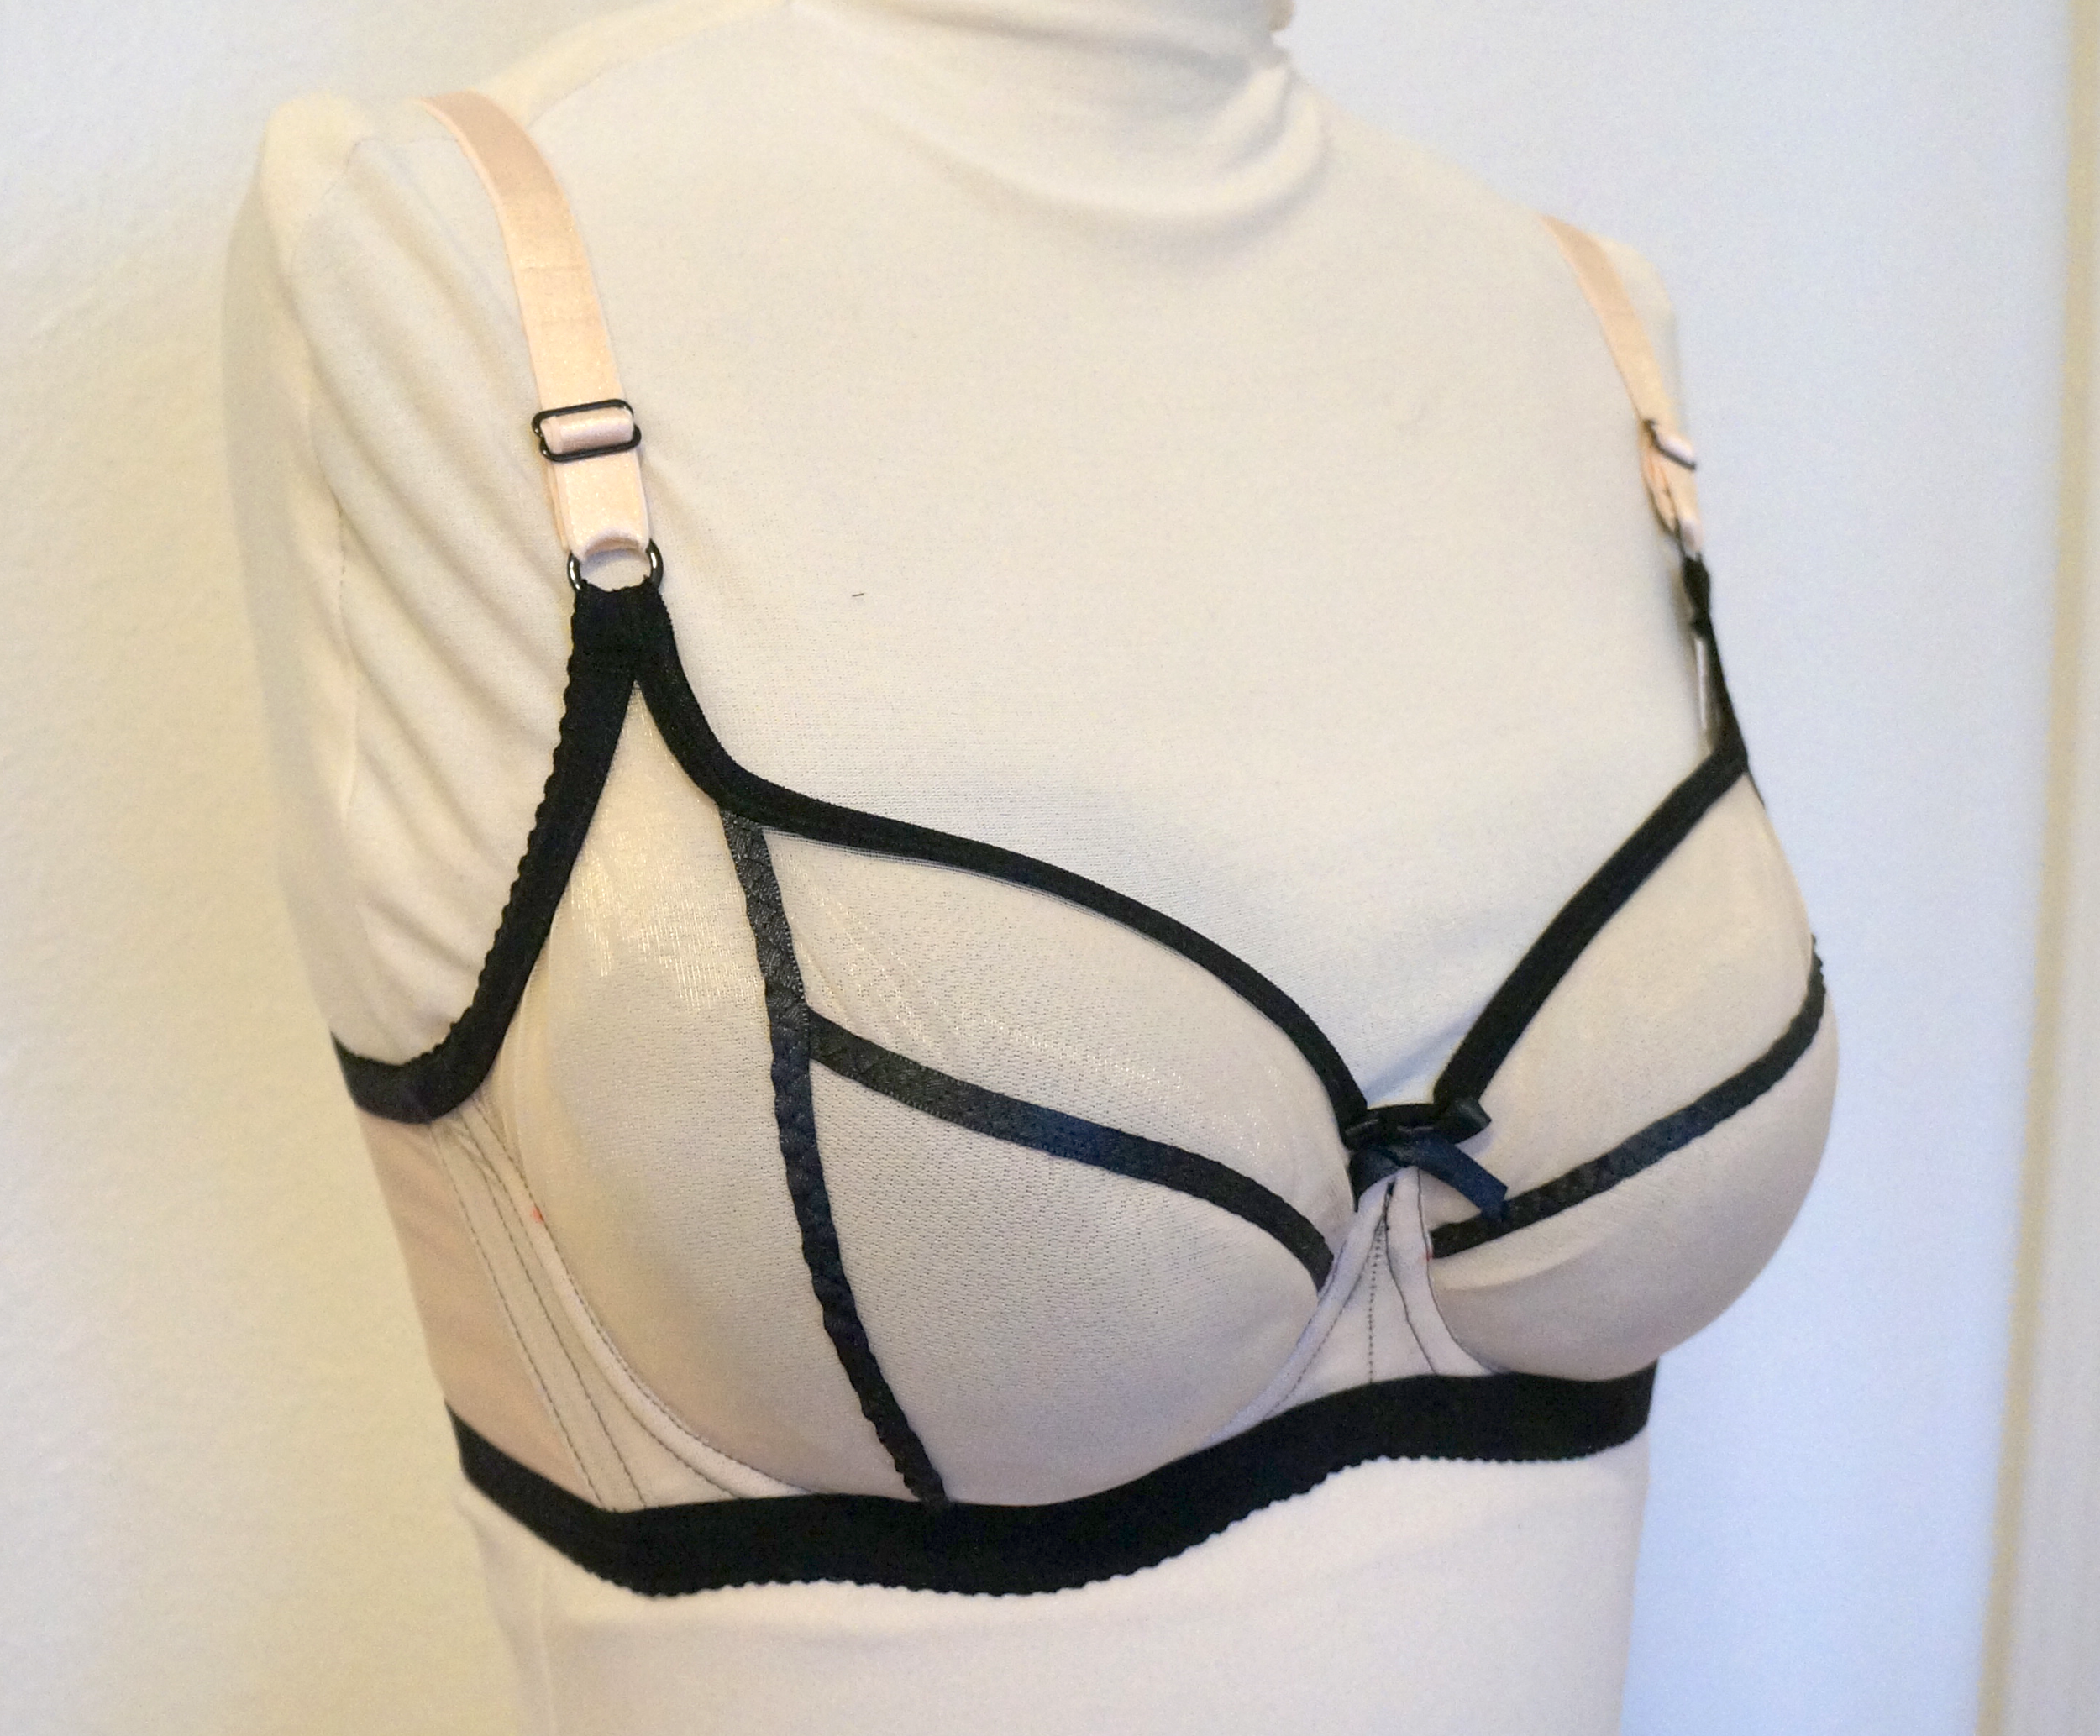
Self Drafted Bra Using the Kristina Shin Method
Finally finished this little number that had been put on the back burner for several months. Trying to meet fitting deadlines while planning for my Japan Trip with 2 littles was... challenging.
This bra is essentially the culmination of my recent adventures in various custom drafting methods. See my review on the pattern making books: Bra-Makers Manual by Beverly Johnson and Pattern Drafting for Lingerie by Kristina Shin, PhD [link HERE].
AMENDMENTS/ALTERATIONS
This bra was drafted using Kristina Shin's book Pattern Drafting for Lingerie with a few amendments. I've indicated which amendments were specific to my physiology vs a suggested amendment/note for the book.
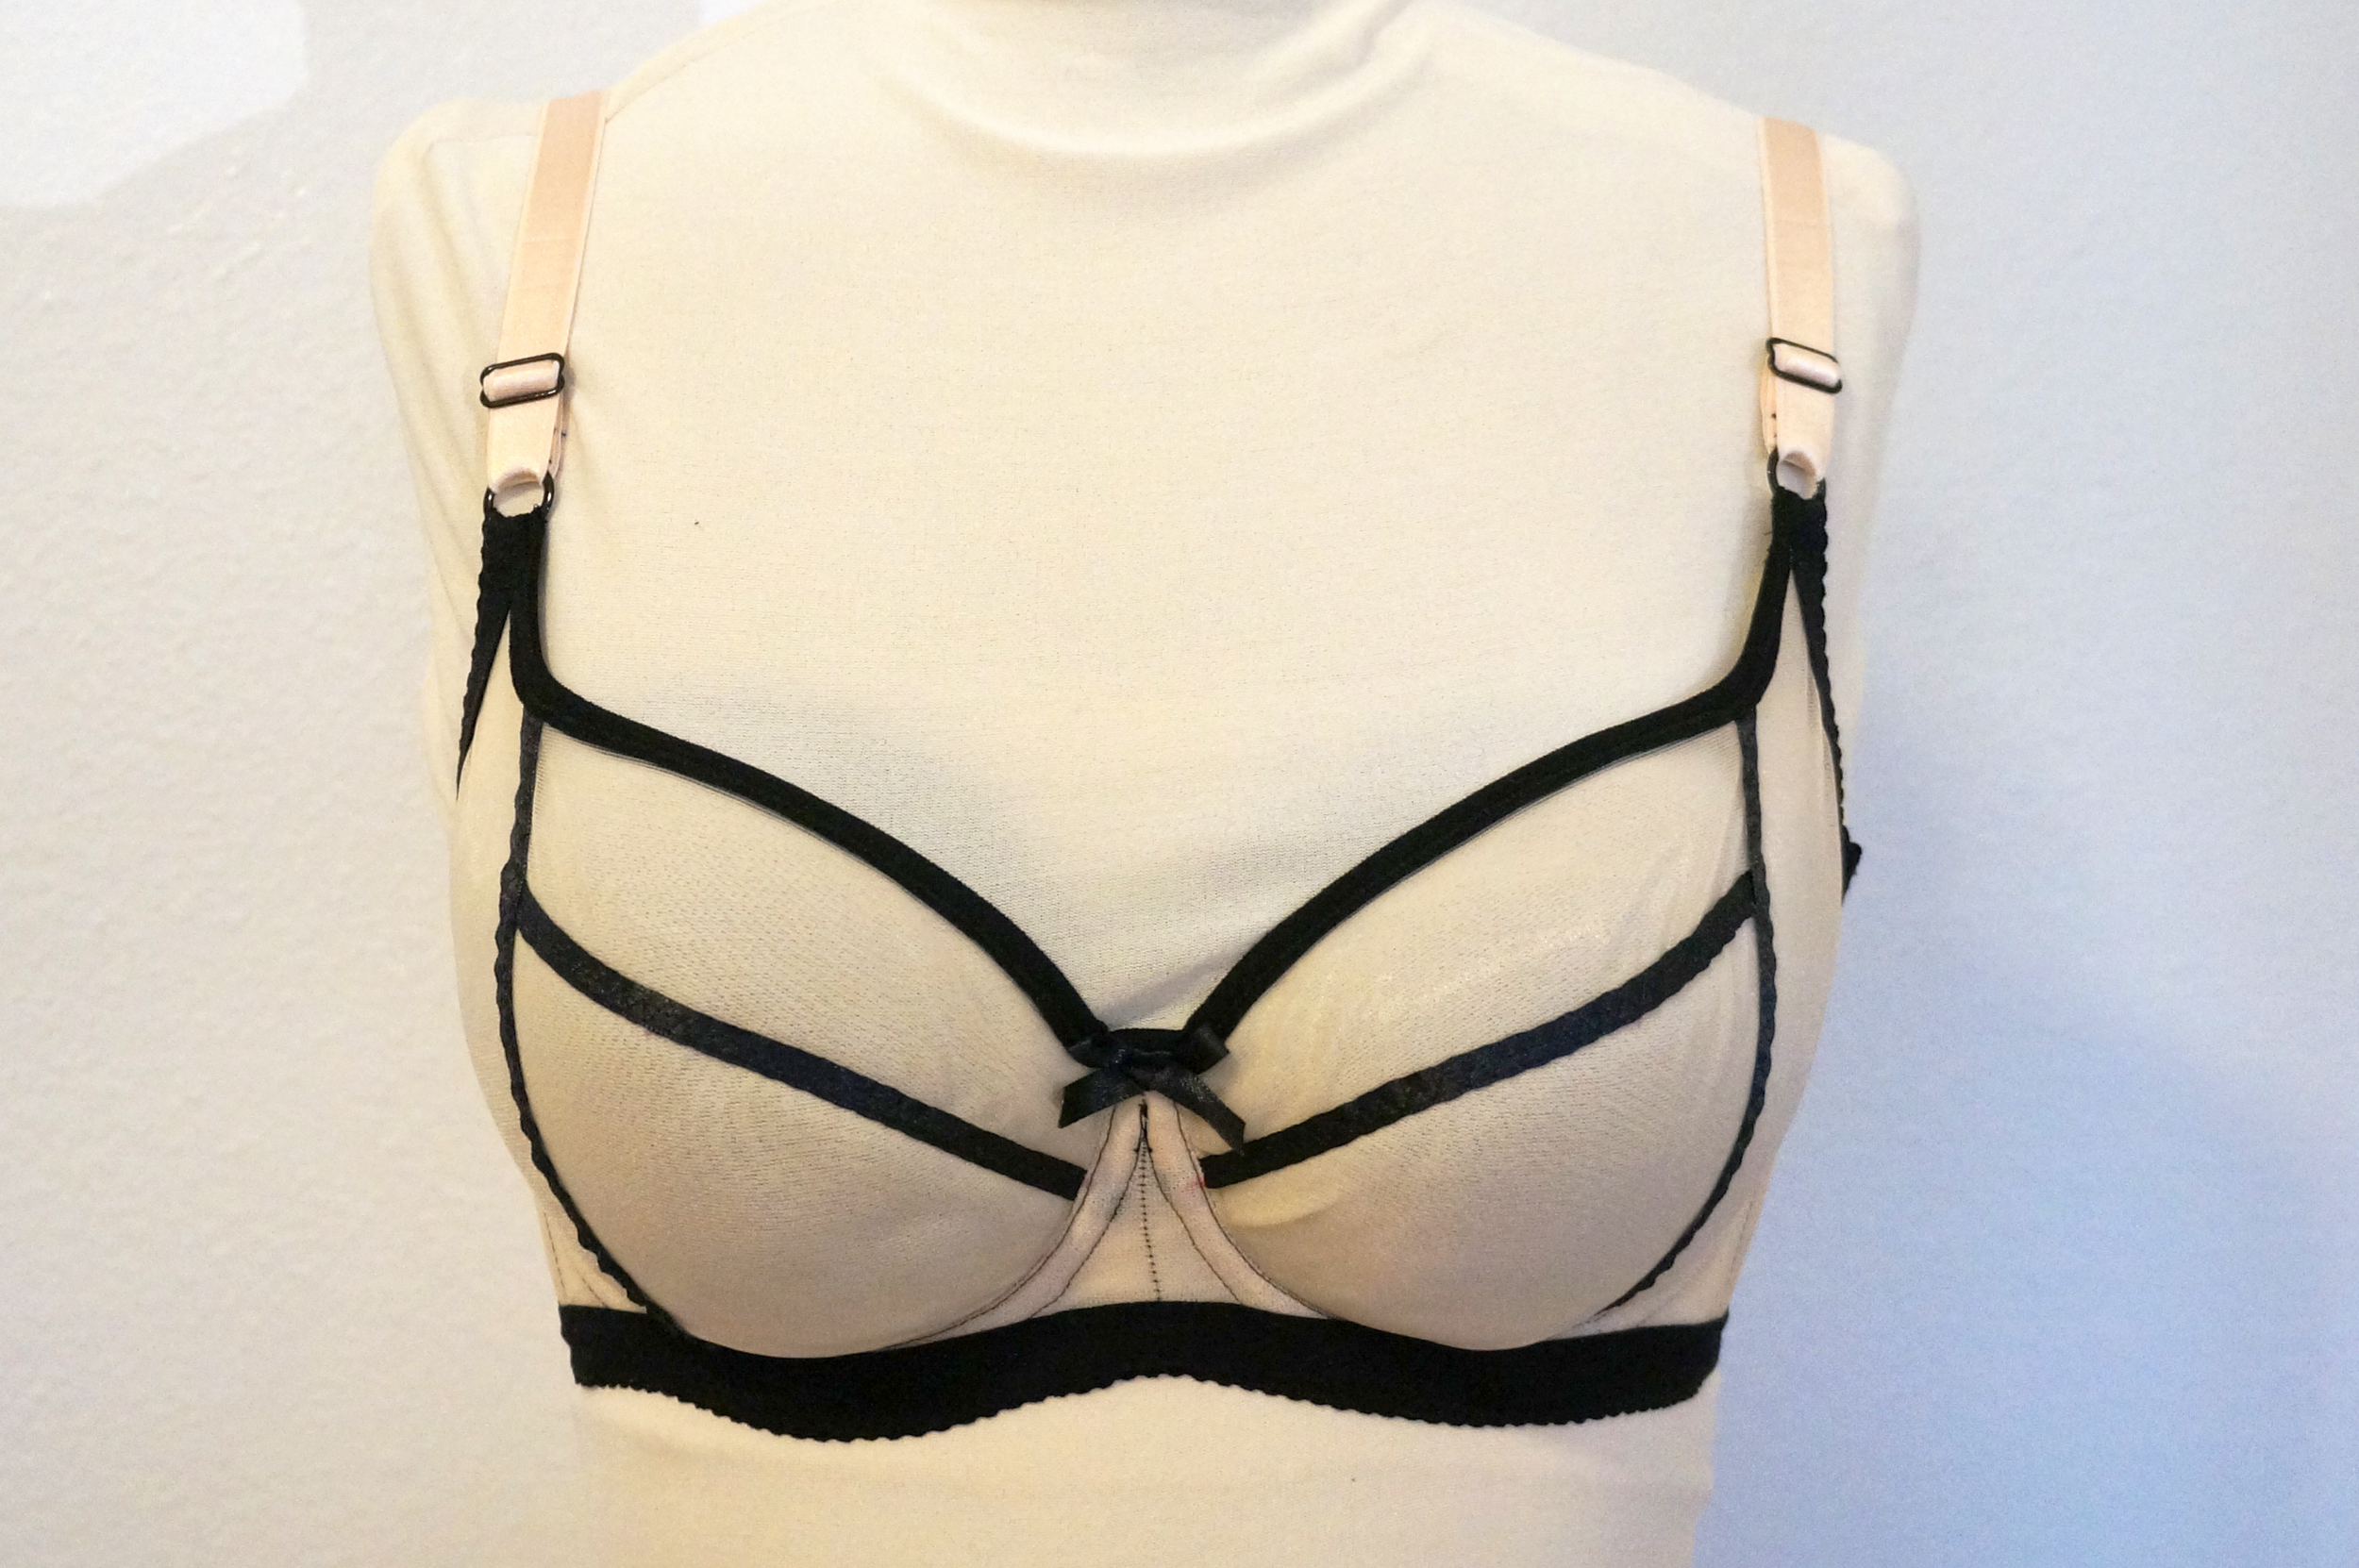
- Reduced center gore width [personal]
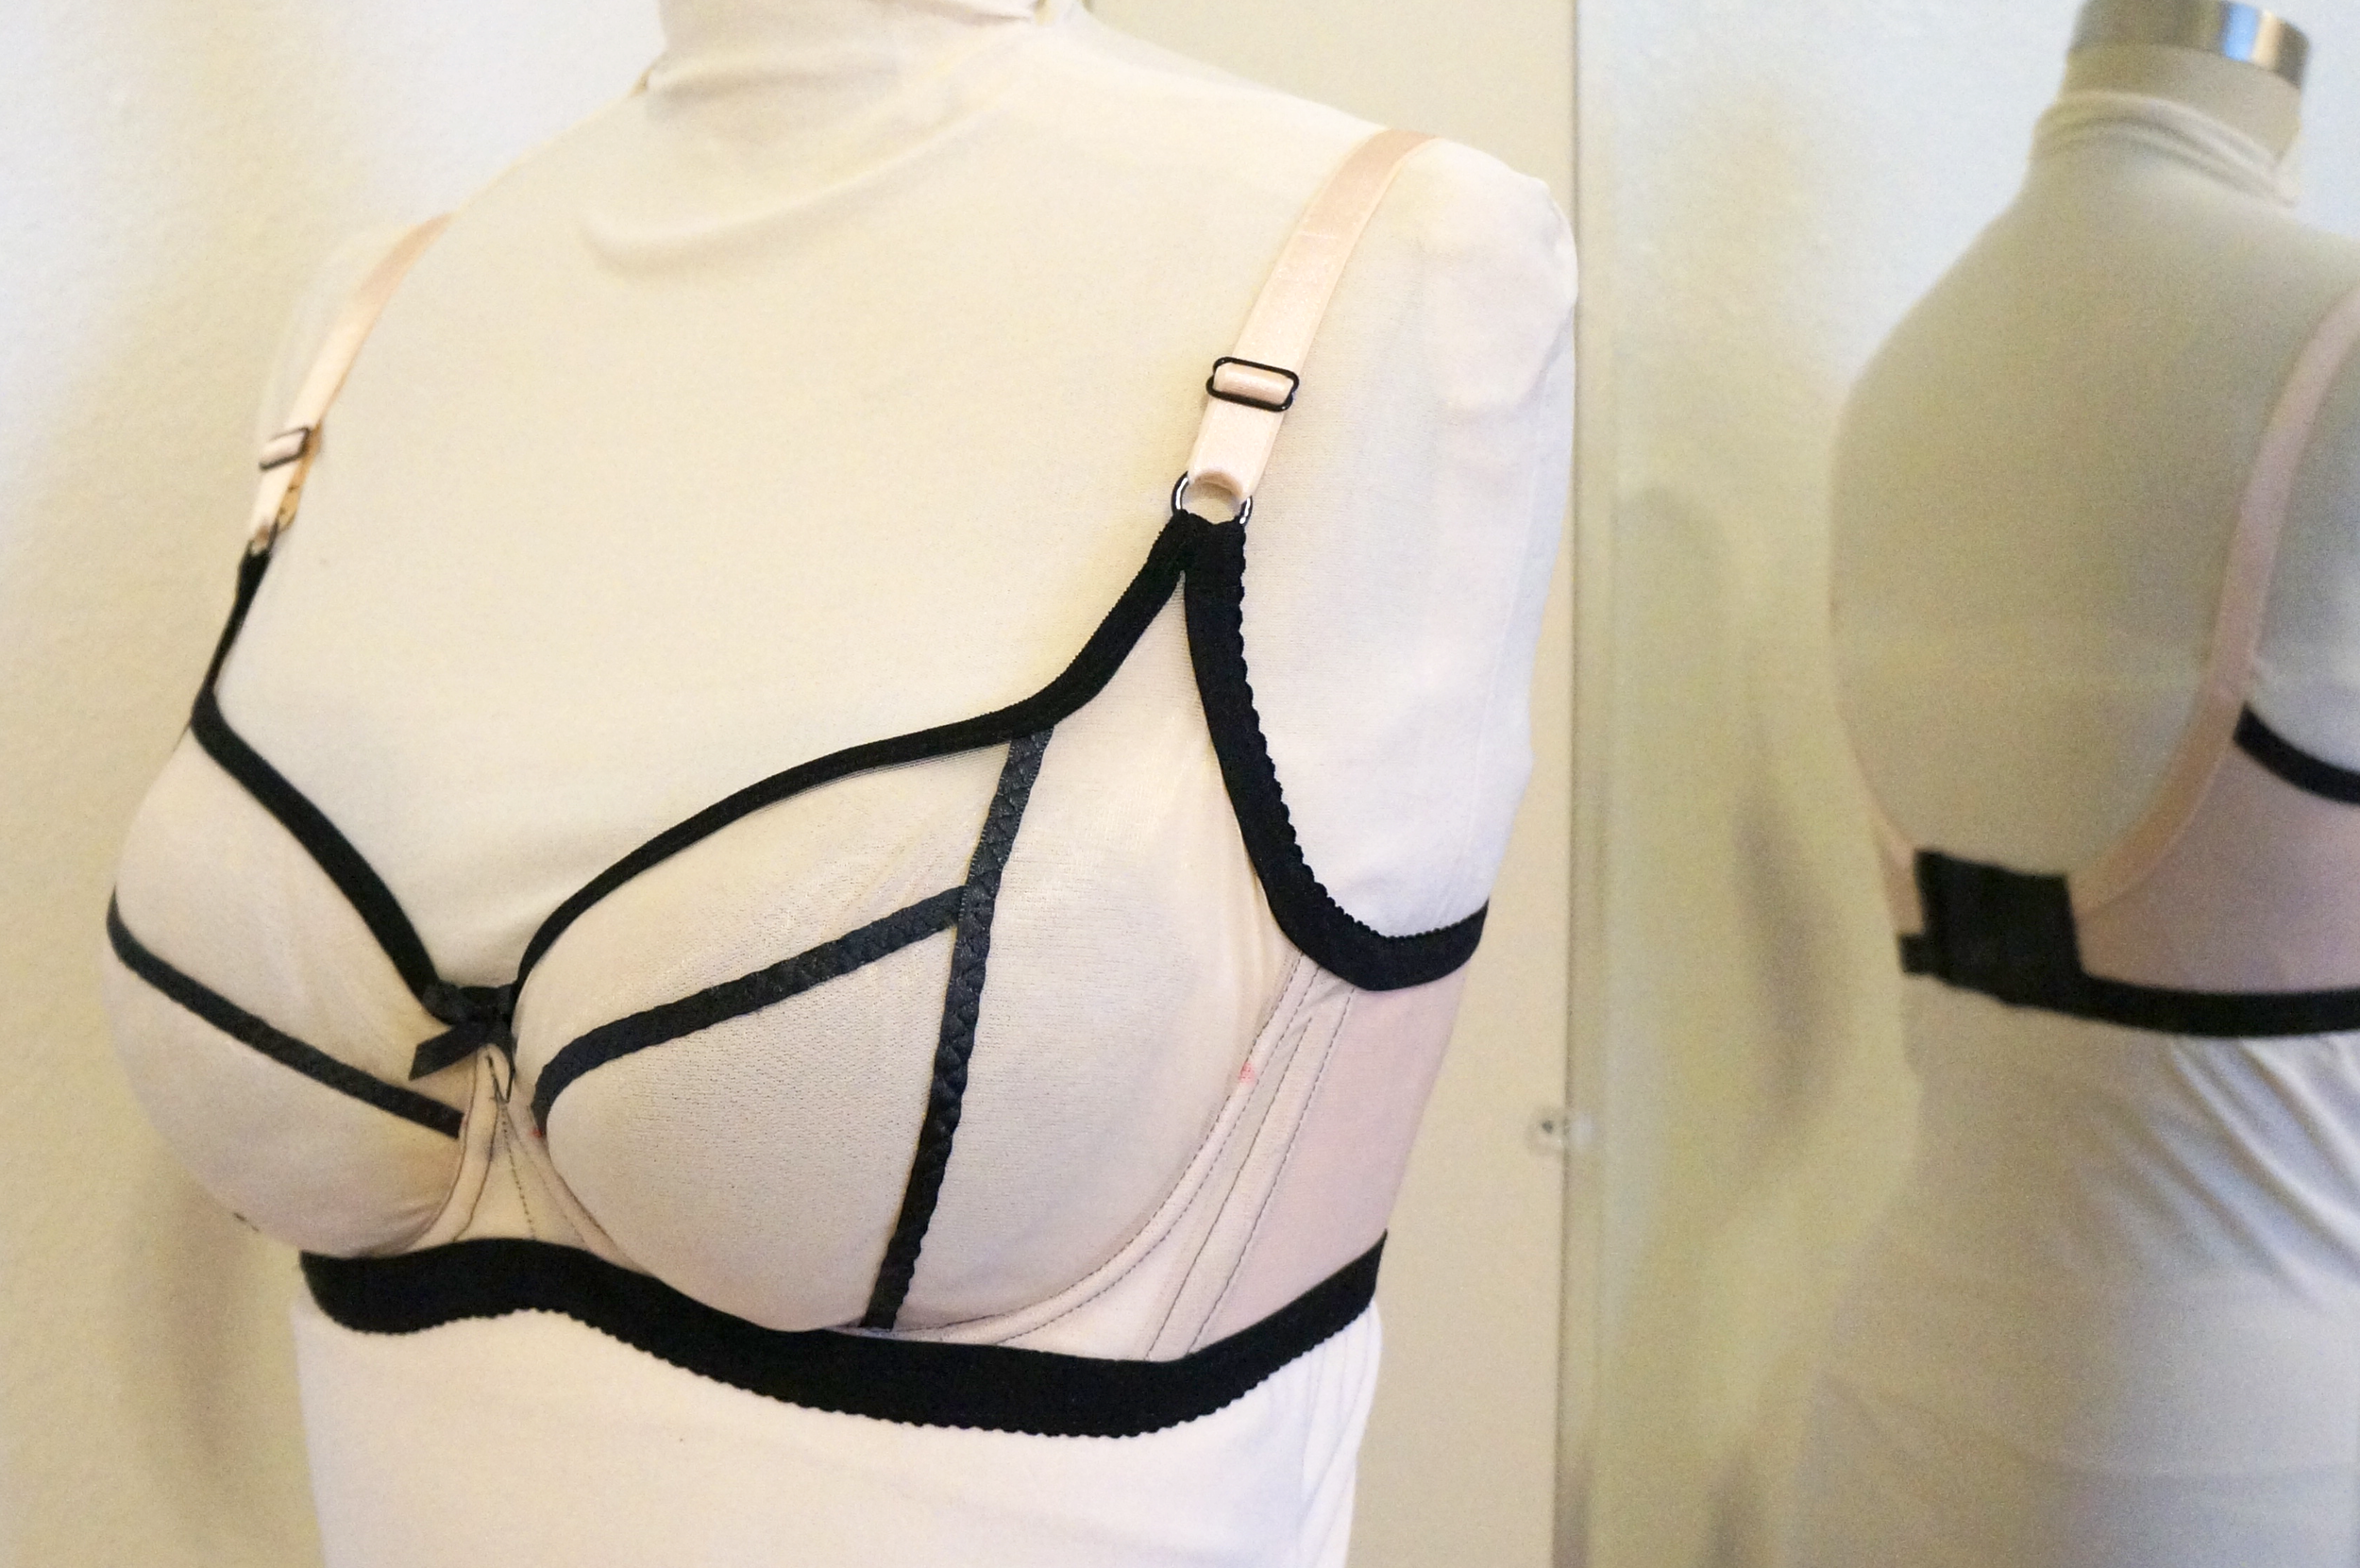
- Shifted center of wireline on band by 5 mm
- Used upper back measurement to calculate wing drop [personal]
- Increased curve distance from 4 mm to 8 mm when splitting the lower cup [personal]
- Added 3 cm to the height of the underarm [personal]
- Increased height of back band to accommodate 3x3 hook and eye [personal]
As you can see, the majority of the amendments were specific to my anatomy (narrow set, wide root, outward pointing, soft tissue, and fairly straight upper torso) and very different from what RTW expects. Your amendments may vary depending on individual needs.
Once I had the basic underwire pattern drafted, I used it to create an Intermediate block to change the seam lines. Again, the lower cup curve was increased as was the width of the power bar. Used another chapter to alter the back band into a "U" shape. I'm quite pleased with the result!
Bra was created using a single layer of sheer cup lining with a layer of netting on bridge only (both from Arte Craft), satin ribbon for cup accents, fold-over elastic and Firm Scalloped Elastics and "Grooved" Strap Elastic from my shop [link HERE].
Construction of the bra took a bit longer than usual due to many of the design details. The cups were sewn up, ribbon applied to the seam allowance side then inserted into the frame backwards so the ribbon detail would be visible on the outside. Similar treatment was applied for the band elastics.

The cups and bridge fit wonderfully. The girls are up and forward thanks to the powerbar (without the help of any internal sling as I would normally insert). The interior isn't as pretty due to many of the inverted construction process but I consider this a success nevertheless! One happy lady here.
ISSUES
I realized to late that I had some how copied the wrong line when transferring my draft to pattern piece and had reduce the width of my center gore on the fly. The cup seams was a bit too tight due to my not stretching the fabric (slightly) as I sewed. I managed to rectify the vertical seam after sewing the cups into the frame but was not able to do the same to the diagonal seam without removing the cup. The band was too tight (easily addressed with an extender) due to a bit of weight from my Japan trip and possibly due to my using 15% stretch reduction instead of 10% (my firm elastic has a stretch factor of 50%).
UPDATE
Having actually worn the thing for a few hours now, I realize its more of a balconette or demi bra than I originally intended. Which is great as I needed one of those too but a bit more bounce when on a staircase (and significantly more when chasing after my pre-schoolers). A few more minor details to address for the next round (moving the strap in a bit, insert tiny 3 mm wedge in upper cup for larger boob, and increasing the curvature between strap tab band).