
TUTORIAL - Wireline and Cradle Mod for Extreme Omega Shapes
We are thrilled to be able to offer our first underwire bra pattern in the GG-KK (UK) size range and are very thankful for our wonderful pattern testers. Today’s tutorial on the Labellum Bra Pattern focuses on modifying the cradle to take a significantly smaller underwire.
This was inspired by one of our own whose omega shaped breasts needed a cradle that was more than 6 sizes smaller than her cup volume. Her extreme omega shape meant she needed the cup pattern pieces from one size set and the cradle pieces from another. Those with slight omega or projected + narrow roots will likely NOT need this mod as the patterns have a 6 size over lap between DD-GG and GG-KK.
Instead of having her buying both size sets, this tutorial will walk you through how to use the Labellum Cradle Chart to modify the cradle pattern pieces.
While this tutorial was designed for the Labellum Underwire Bra Pattern, the methodology can be applied to just about any underwired bra pattern (including the Lusamine) with some minor changes. For patterns without a Cradle Size Chart, you will have to draft your own wireline using a well fitting wire and add wire play, wire tilt and wire spring (if applicable).
Lets get started!

Step 1.) Have your cradle pieces and cradle chart ready. Remove seam allowance from the pattern pieces and highlight the cradle size needed.

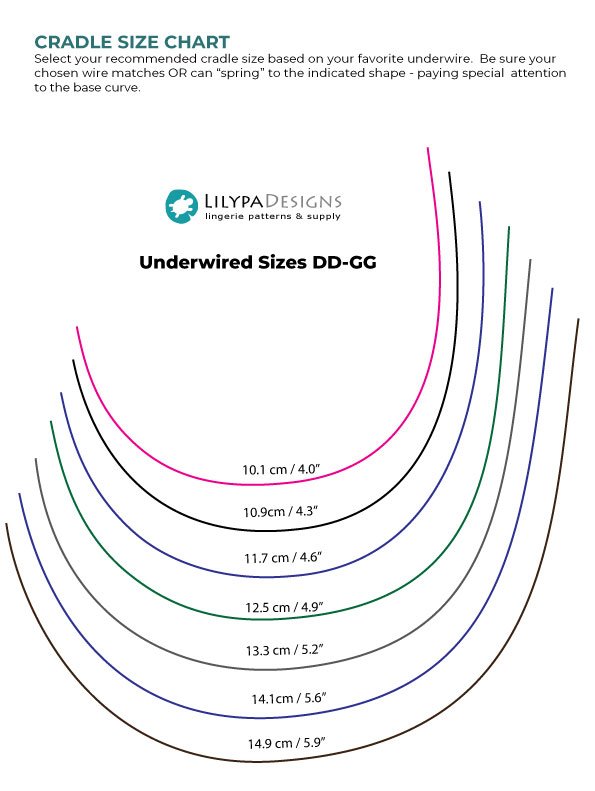
Step 2.) Lay out the cradle pieces so the vertical seam aligns. Place this on top of the highlighted cradle size.
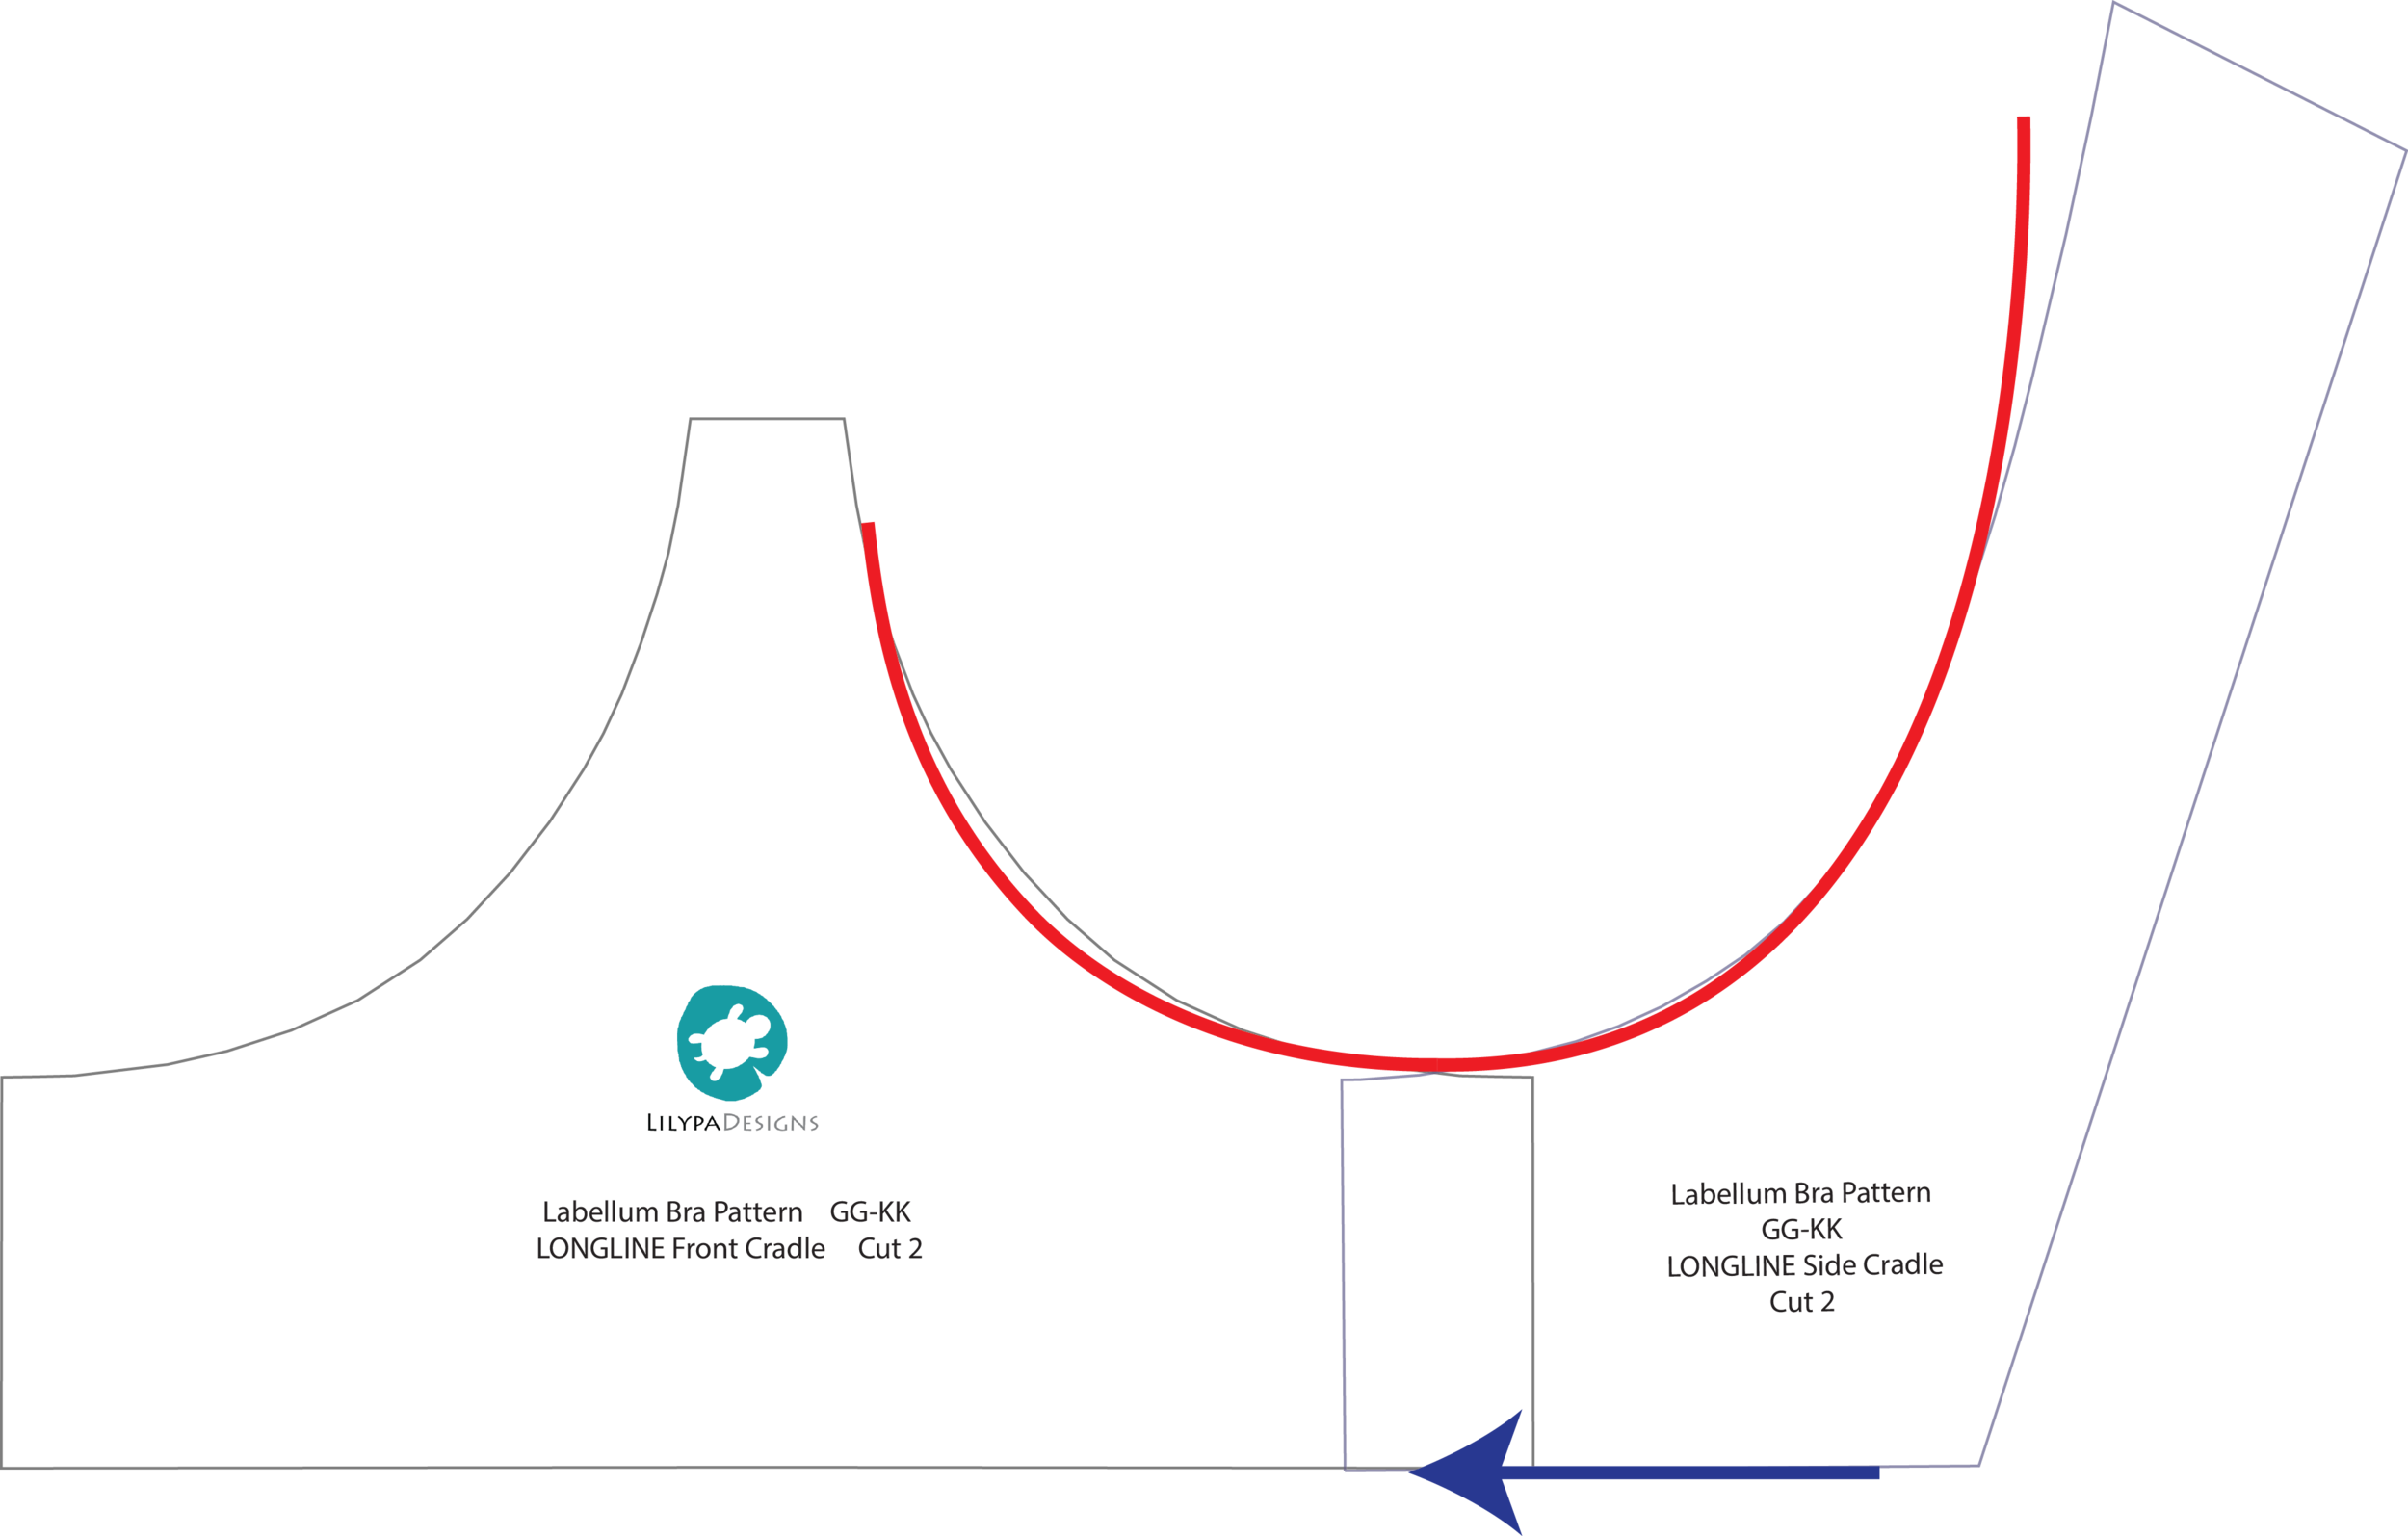
Step 3.) Overlap [BLUE ARROW] the vertical seam so the wireline of the pattern pieces match the wireline WIDTH of the highlighted cradle size [RED].

Step 4.) Note the distance of the overlap [PINK]. Also note this distance x2.

Step 5.) Add the overlap length [PINK] from Step 4 to the side cradle seam via slash and spread. Take care to keep the length of the side seam the same.
Depending on your needs, you may need to keep the height of the original cradle at the center gore and underarm. If height of cradle is too tall, shorten at this time.
Depending on your needs, you may also need to adjust the location of the side seam. For smaller ribcages, the overlap length maybe added to the back wing in order to keep the side seam centered. For larger ribcages, the overlap maybe added to the side cradle instead.
Add your seam allowance back on and you’re ready to go!

OPTIONAL Step 6.) Band length calculations.
Double check the total length of the band length by measuring the half distance [RED]. Multiply this number by two (2 halves of the whole bra), then multiply by the stretch percentage. Finally add 2” (or 5cm) for the width of the hook and eye. This final number should match your underbust.
BAND LENGTH FORMULA
Half Band length x 2 x (Stretch Percentage + 1) + Hook & Eye Width
Example: 14” (half band length) x 2 x 1.12 (12% stretch) + 2” (hook & eye) = 33.4” Band